All posts by Blogger

ImDisk Toolkit | RAM Drive for Windows

I was playing around one night on the computer with some large video files and things were taking a bit of time. Being large and working off a mechanical HDD, I remembered back to the days when you could use the old DOS RAMDrive.sys to create a RAM drive using system memory.

This led me to search the interwebs for a tool that would allow this in windows 10. That’s when I found ImDisk ToolKit. ImDisk Tool kit, loads a driver that lets you create a RAM drive.

I wont go into specifics because I think once you run the app to create a ram drive, it will be fairly self explanitory.

This tool will let you mount image files of hard drive, cd-rom or floppy, and create one or several ramdisks with various parameters.

This all-in-one package includes the ImDisk Virtual Disk Driver (2.0.9), the DiscUtils library that extends the number of supported image file formats, and adds several GUIs and features.

64-bit:
https://sourceforge.net/projects/imdisk-toolkit/files/20170706/ImDiskTk-x64.exe

32-bit:
https://sourceforge.net/projects/imdisk-toolkit/files/20170706/ImDiskTk.exe

Requirements:
Windows XP, Vista, 7, 8, 8.1 or 10 (32 or 64-bit).
Some image file formats also require .NET Framework 4 (included in Windows 8 and later) to be mounted with the DiscUtils library.

Features

  • Ramdisk with optional dynamic memory management
  • Image file mounting, many formats supported

Source: ImDisk Toolkit download | SourceForge.net

Continue reading ImDisk Toolkit | RAM Drive for Windows

Best Random Password Generator 2018

Here is another good free Password Generator suggested by a reader of my site. Thanks Kaylee. 🙂

Use the this free Password Generator to create highly secure passwords that are difficult to crack or guess. Just select the criteria for the passwords you need, and click “Generate Password(s)”. Remember, the more options you choose, the more secure the passwords will be.

Best Random Password Generator 2018

Source: https://www.vpnmentor.com/tools/secure-password-generator/

Linux Deployment from Windows Server 2012 R2

Files required for this guide located here

If you haven’t already, read this post first for pre-assumptions.

Loader Loading...
EAD Logo Taking too long?

Reload Reload document
| Open Open in new tab

Note: When Centos is installed, there is a good chance it will come up terminal mode complaining that the license agreement has not been accepted. To fix it and get into the GIU, follow the instructions here.

http://www.ehowstuff.com/how-to-fix-gnome-license-not-accepted-issue-on-centos-7/

Credits to the author of this article.

The next part will cover adding Clonezilla and Part’d Magic…

Windows Deployment Server

This is a quick write-up on WDS, where I have separated the WDS from the DC/DHCP Server. Now, if you are reading this article you have probably setup WDS on the one server with the DC and DHCP roles configured.

What I wanted was a separate WDS Server.. Easy, well I thought so until I tried to deploy my first workstation. There are some gotchas.

What I will do is skip the installation parts covering WDS with MDT.

Starting with a configured DC and a DHCP scope on one server, and WDS/MDT installed on the 2nd server.

Import and configure images as per usual, create a CustomSettings.ini file and Bootstrap.ini to the way you want.
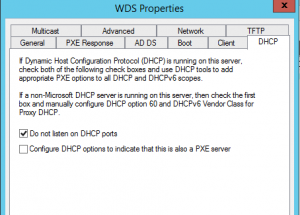
so, the actual settings. First of all, because the WDS Server isn’t on the DHCP server you need to untick both  boxes on the DHCP tab of the WDS Server properties

this shows the top box selected, and yes the deployment worked, but I took a checkpoint of my server, unchecked the top option and deployed another workstation.

DHCP, this is where its all at.

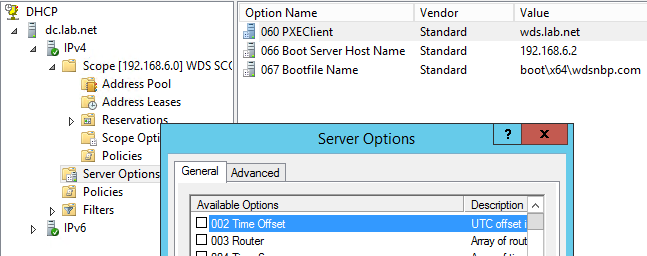
First, because neither option above is selected, there is no option 060 available to select when configuring DHCP scope or server options. So one must be created.

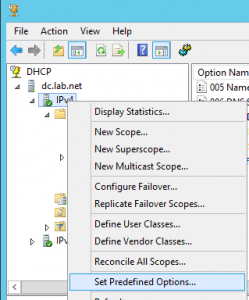
Open DHCP and right click on the IPv4 container. Select “Predefined Options”
IPv4 Pre Defined
then on the Predefined options screen, select Option Name and scroll to 060 PXEClient, click Add, set the Data Type to String, give it a description, set the Option name to PXEClient. click OK
DHCP Predefined PXE Option-2
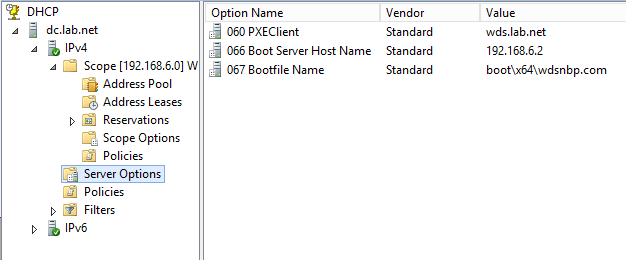
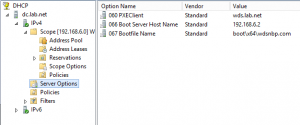
Go back to DHCP, and into Server Options, and select Configure options
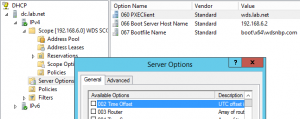
DHCP Server options1

add the following,
DHCP Server options
NOTE: The PXEClient option is set to point to the WDS Server. To do this, right click the option and select properties. Set the String Value to the FQDN or IP of the WDS server.

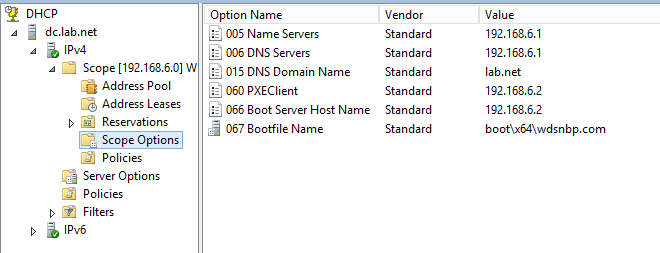
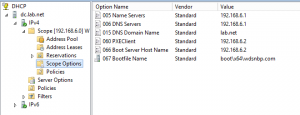
In the Scope Options, I have added the following
DHCP Scope Options

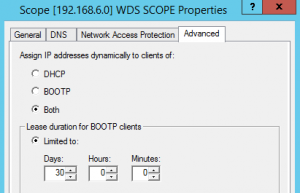
Select the Scope, and right click and select properties. Set DHCP/Boottp to “Both”
Scope properties
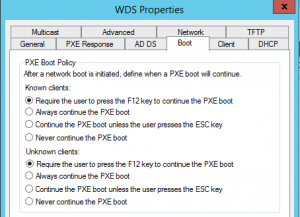
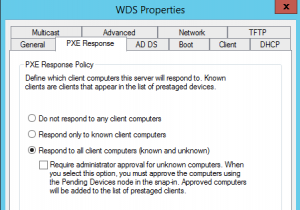
I have also included selected tab settings from the WDS Server properties.
WDS Properties-DHCP
WDS Properties-Boot
DHCP Predefined PXE Response
Restart DHCP and the WDS Services.
I have added a new VM and during the setup of the VM selected deploy an OS latter from a network. Note if a Gen 1 VM a Legacy NIC will be added. A Gen 2 VM will give a NIC that will be able to PXE boot. Either way, boo the new VM and wait for the F12 to PXE Boot prompt.